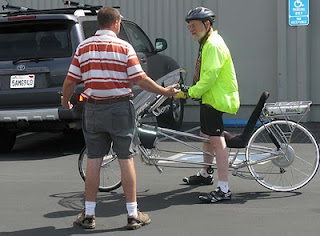
Tuesday Marian drove me to the Velolectric shop to pick up the completed conversion. Joe Robinson showed me the details.
Then I took a ride around the parking lot.
Everything seemed to work so I rode the bike the 8 miles home, down Middlefield road.
At home I had closer look. As I expected, the rear rack mount makes a very tidy installation.
The lock visible at the leading edge of the battery holds it in. When the lock is operated by the key, it pops out and then the battery can be slid out of the frame.
You can take it inside for charging, or for security. Or I suppose, you could swap it out for another, charged battery, if you were on an endurance run of some kind.
The back of the battery has a large reflector and one tiny red LED taillight.
This is pretty useless. It doesn't have a blink mode, for instance. BionX could easily have incorporated a 3-LED or 5-LED blinking light in this case at nominal cost. As it is, I am going to have to find a way to reinstall the nice blinker that I bought, below or beside the battery.
The BionX console is readable and informative. (click this or any other picture to enlarge) The arc-shaped pattern in the center is basically an ammeter: lines appear from the right to show current going into the motor when it is assisting, and lines appear from the left to show current being generated by the motor when it is braking.
The big digit 0 on the right is the assist or generate level. Pressing "+A" raises the assist level from 1 to 4; "+G" lowers it. Lowering past zero commands generate levels 1 to 4. I'll talk more about these levels in the next post.
On the left is a speed readout; the motor knows just what speed it's going. The smaller readout below can be set to max speed, time of day, average speed.
Next entry: first impressions of the ride.


No comments:
Post a Comment